
Op art tattoos grab attention with their clever tricks on the eye, turning simple skin into a canvas of endless motion and depth. If you’re exploring ways to add a bold twist to your look, these designs deliver fun and flair without the fuss. Dive into this list of 29 ideas that show how op art can make your style stand out, whether you’re new to tattoos or ready for something fresh.
1. The Swirling Vortex on Your Forearm
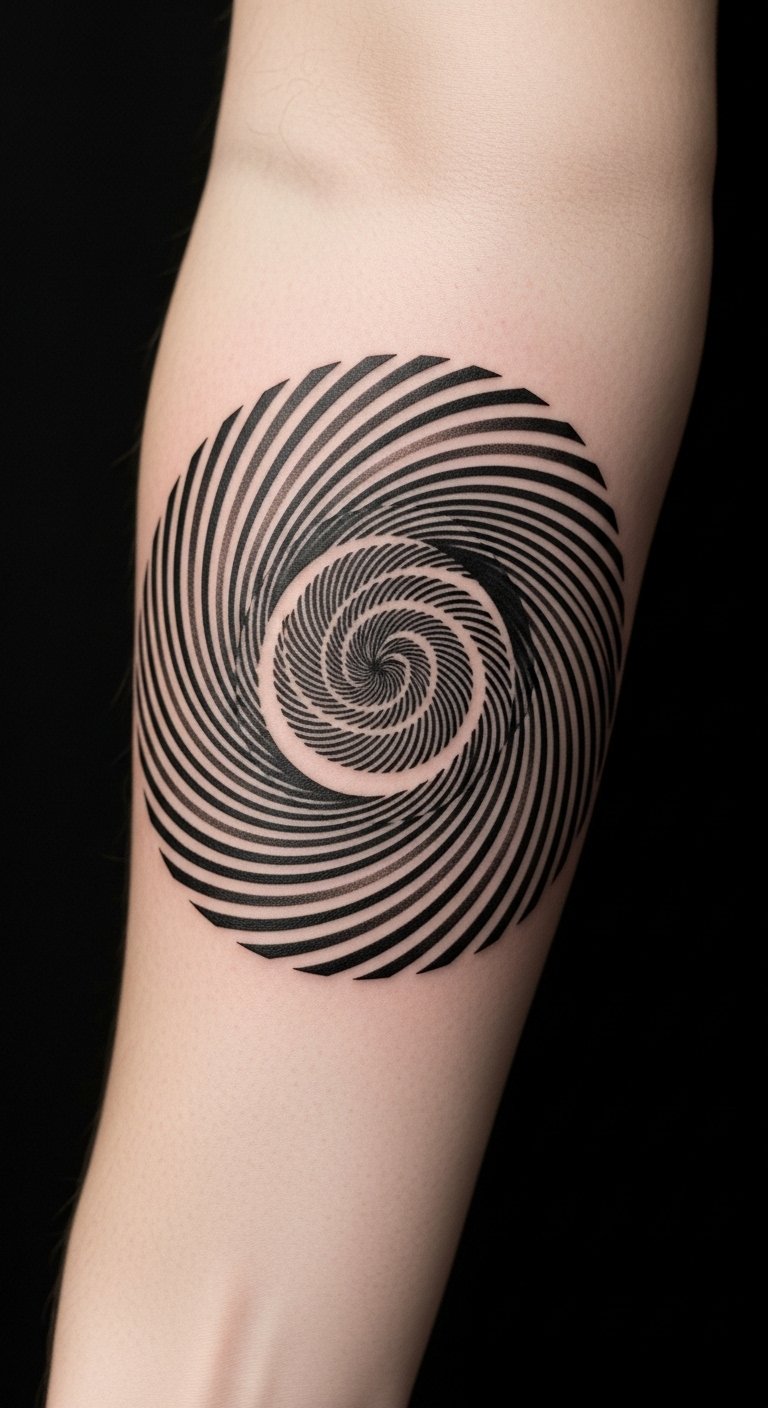
Picture this: a tattoo that makes your arm look like it’s twisting in circles. Start with a simple sketch on paper to test the design. Use a black fine-tip pen for your DIY mock-up; it’s cheap and easy. Pick a spot like your forearm for daily visibility. Go for black ink to keep costs low—most artists charge less for single-color work. Add a personal touch by adjusting the swirl to fit your arm’s curve. This design pops with just a few lines, so ask your artist about basic tools like a tattoo machine rental if you’re bold enough to try at home with friends. Keep it simple: clean lines mean less pain and faster healing. Try a temporary tattoo sticker first to see how it feels. You’ll love how it adds energy to outfits without much effort.
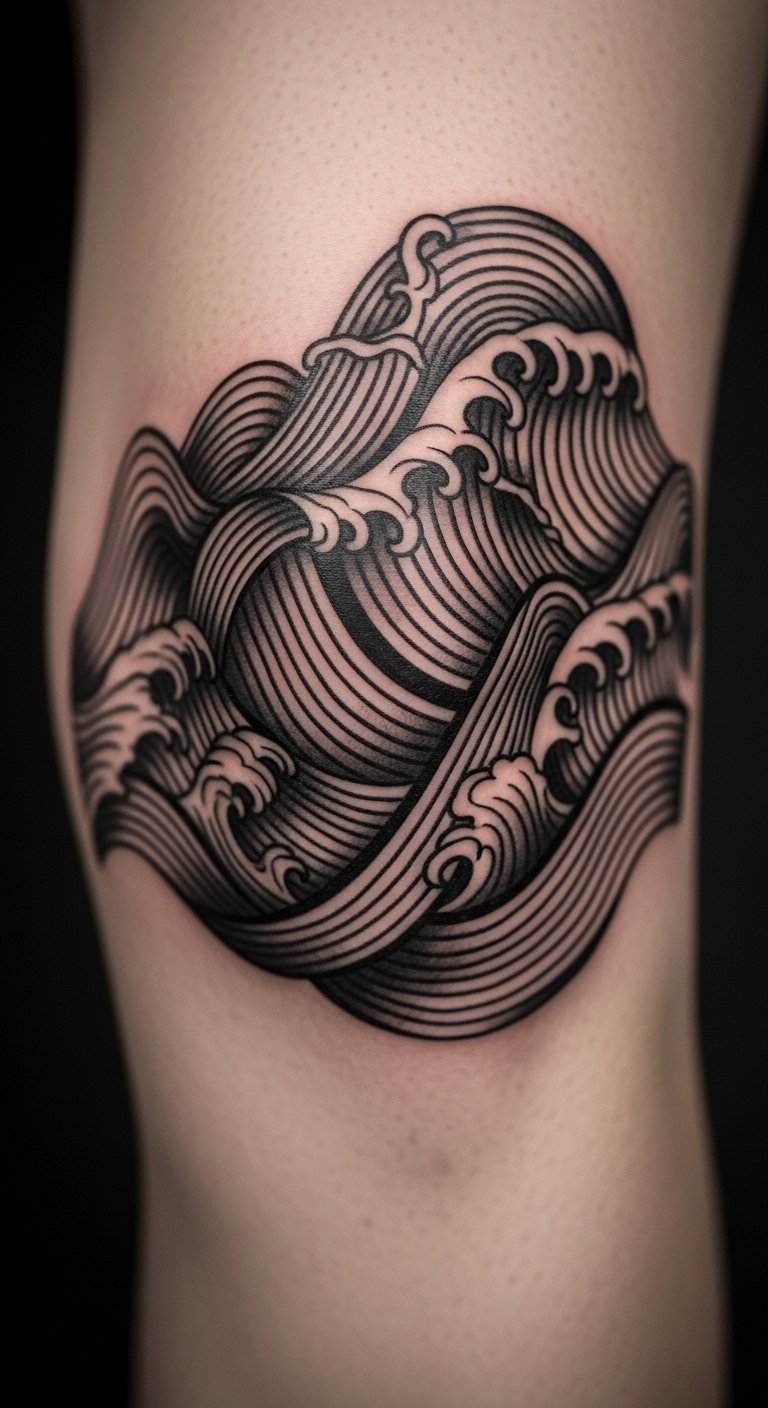
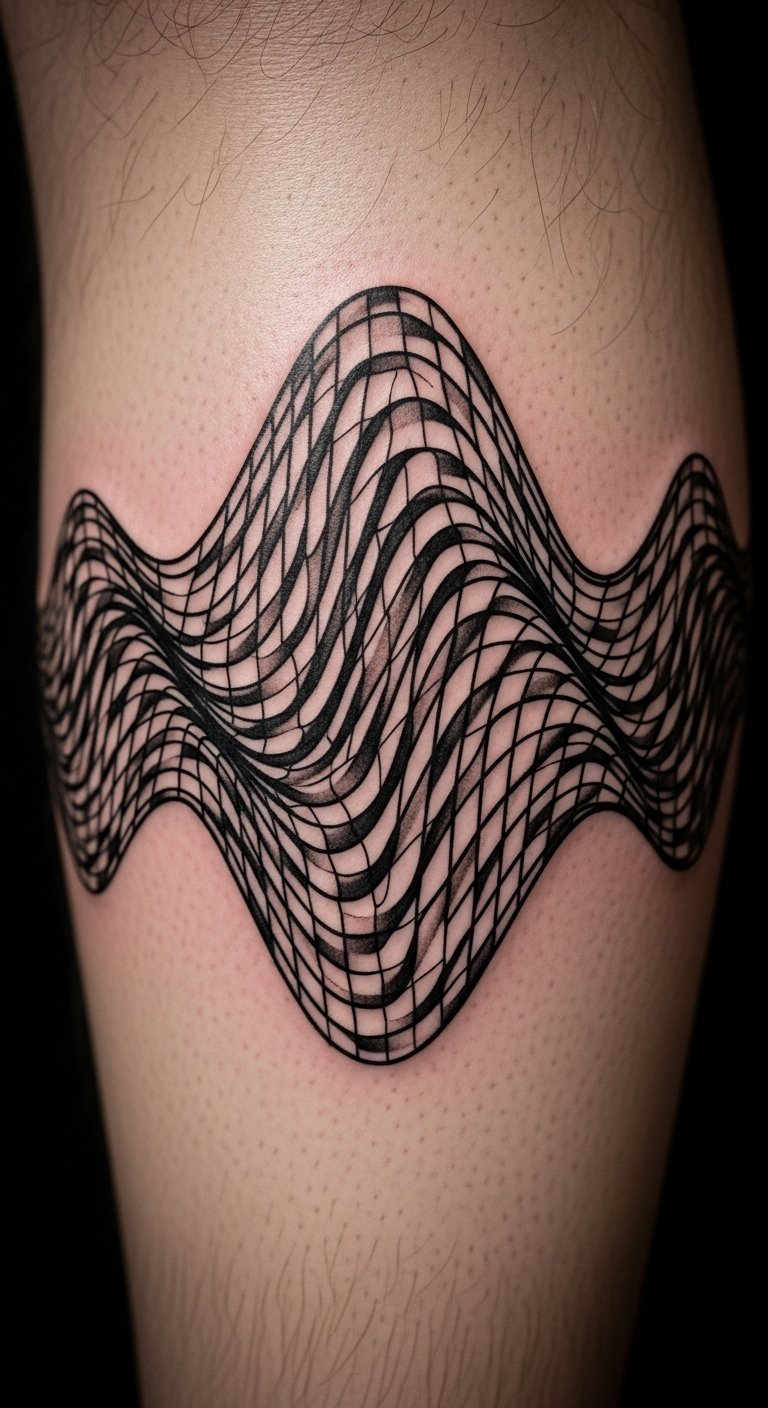
2. Geometric Waves Across Your Shoulder
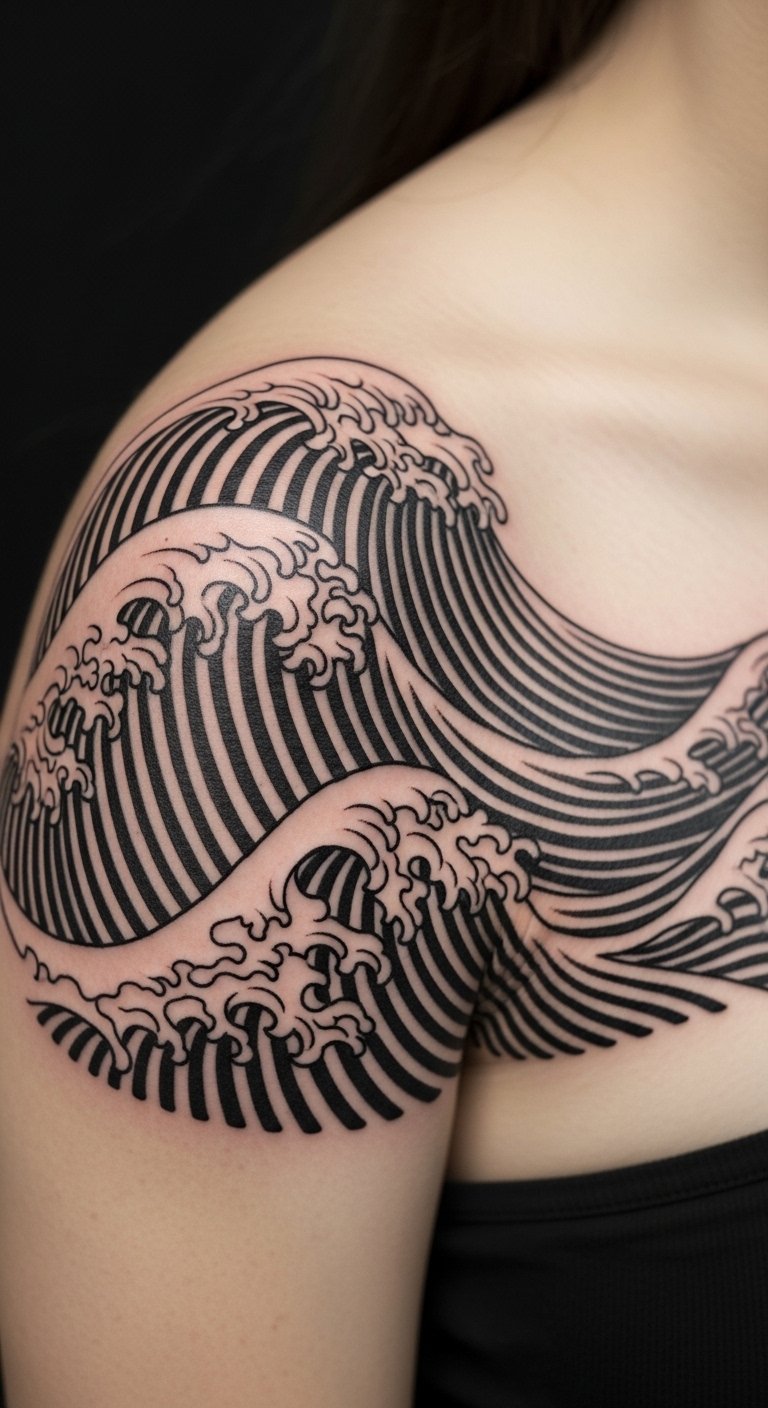
Imagine waves that seem to move on your skin. Draw it out with a ruler and pencil on paper for a quick plan. This costs nothing and helps you tweak shapes. Choose your shoulder for a spot that hides easily under clothes. Stick to black ink for budget savings—it’s straightforward and fades less. Make it your own by adding small waves based on your favorite patterns. If you’re handy, use washable markers to practice on your body first. Artists often have affordable options for smaller designs like this. The key is symmetry, so align it with your body’s natural flow. Heals fast with basic care like moisturizer from your bathroom. Wear it proud to jazz up tees or dresses.
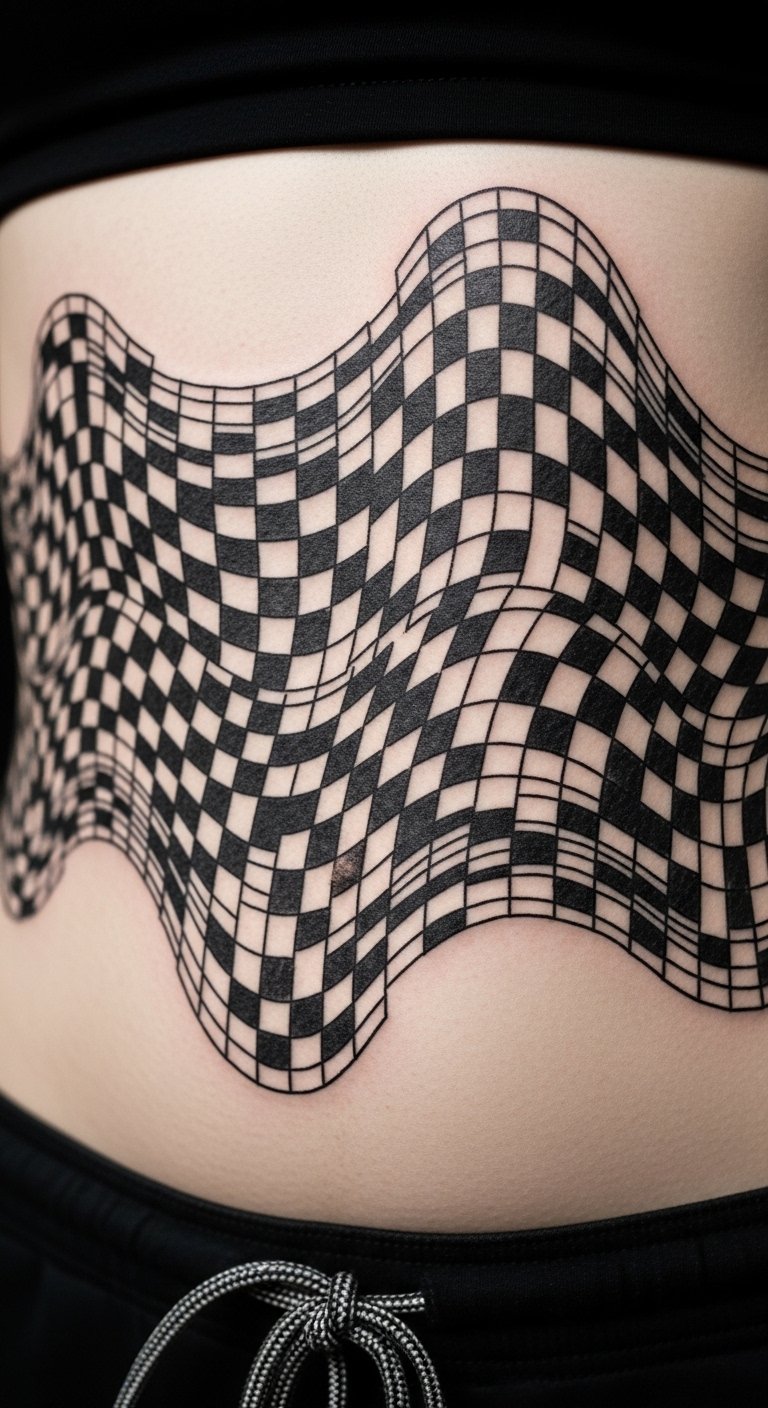
3. Black and White Checkerboard on Your Calf
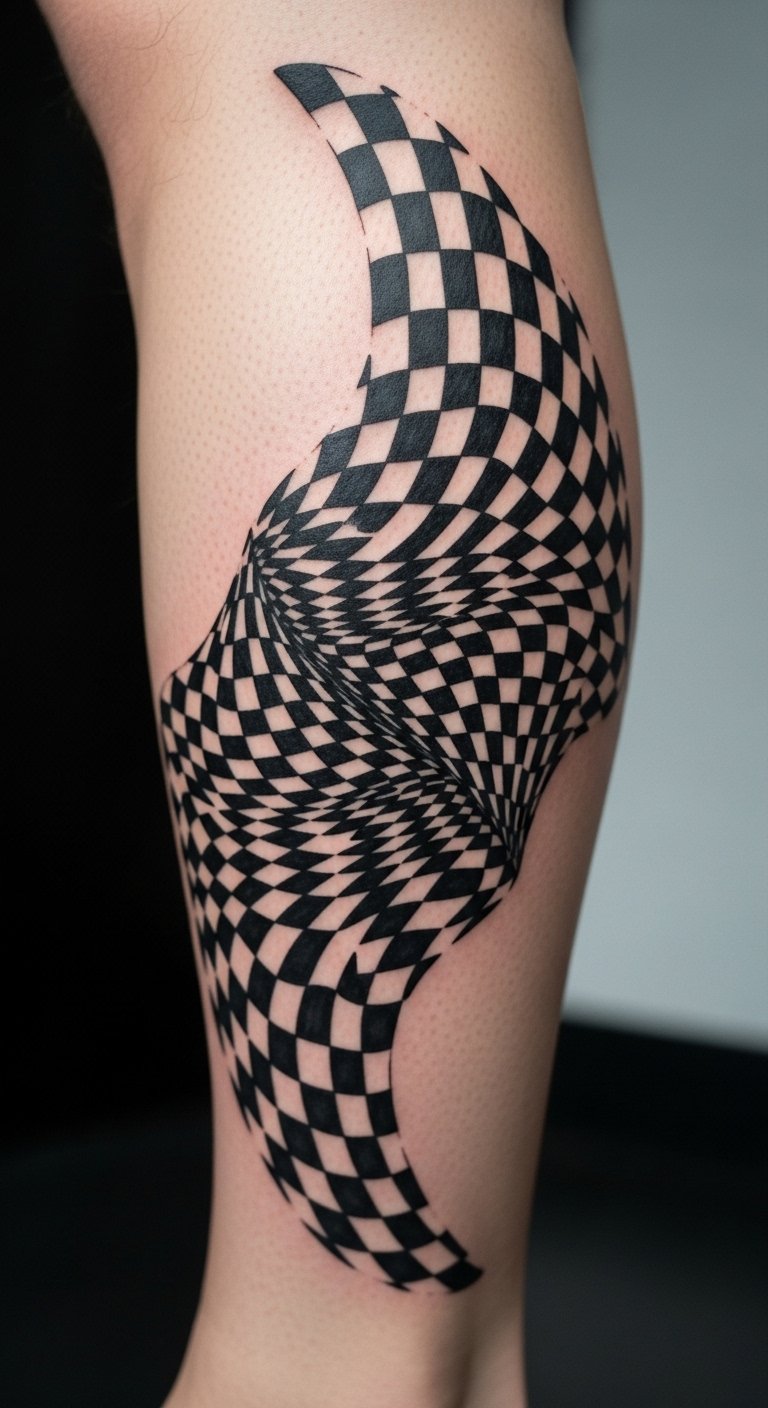
Think of a checkerboard that plays tricks on the eye. Sketch it freehand on paper using a grid for accuracy—grab graph paper from a dollar store. Place it on your calf for easy coverage with pants. Black and white keeps things cheap and classic. Customize by varying square sizes to match your leg’s shape. Test with body paint or stickers you already own. Artists might offer deals for simple patterns, so shop around. This design fools the eye with just ink, making your leg look alive. Care tip: use gentle soap from home to keep it fresh. Pair it with sneakers for a cool vibe that doesn’t break the bank.
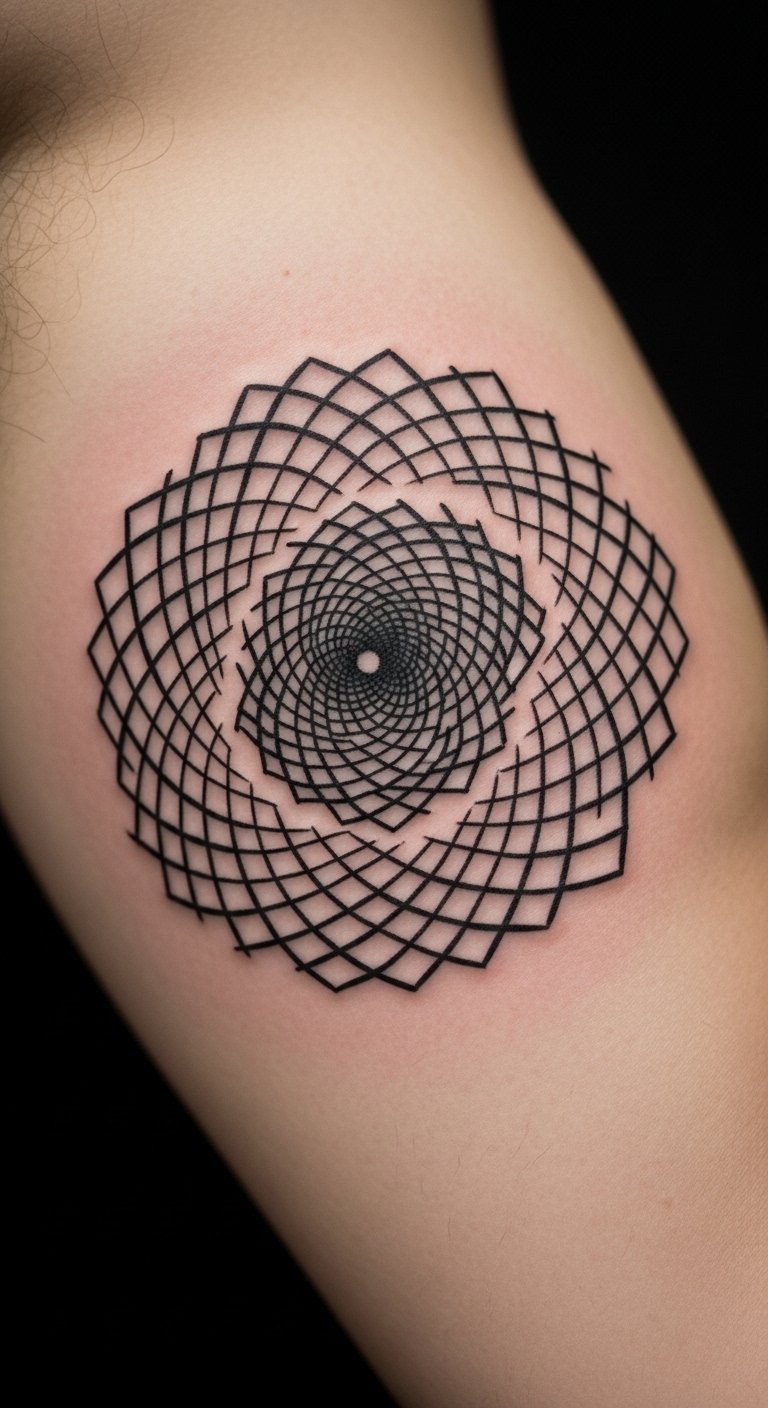
4. Fine Line Spirals on Your Wrist
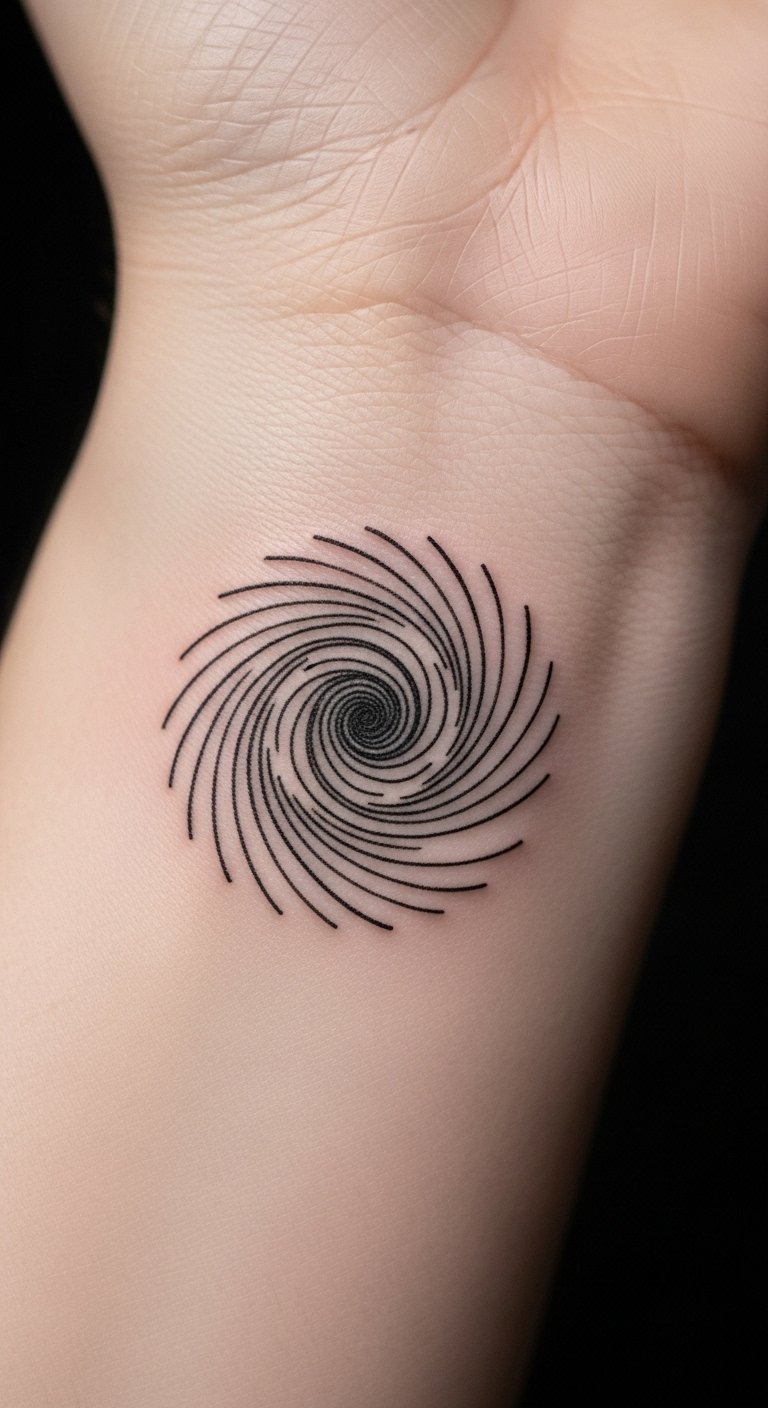
See spirals that dance on your wrist. Draw them with a thin marker on paper to plan ahead—it’s a free step. Wrist spots work for subtle style. Fine lines in black mean lower costs and quicker sessions. Adapt by looping the spirals to your wrist’s width. Practice with string wrapped around your arm for a real feel. Many artists do these affordably since they’re not complex. The illusion comes from repetition, so keep it straightforward. Heal it with lotion you have at home. Rock it with watches for an everyday upgrade.
5. Abstract Dots Creating Depth on Your Back
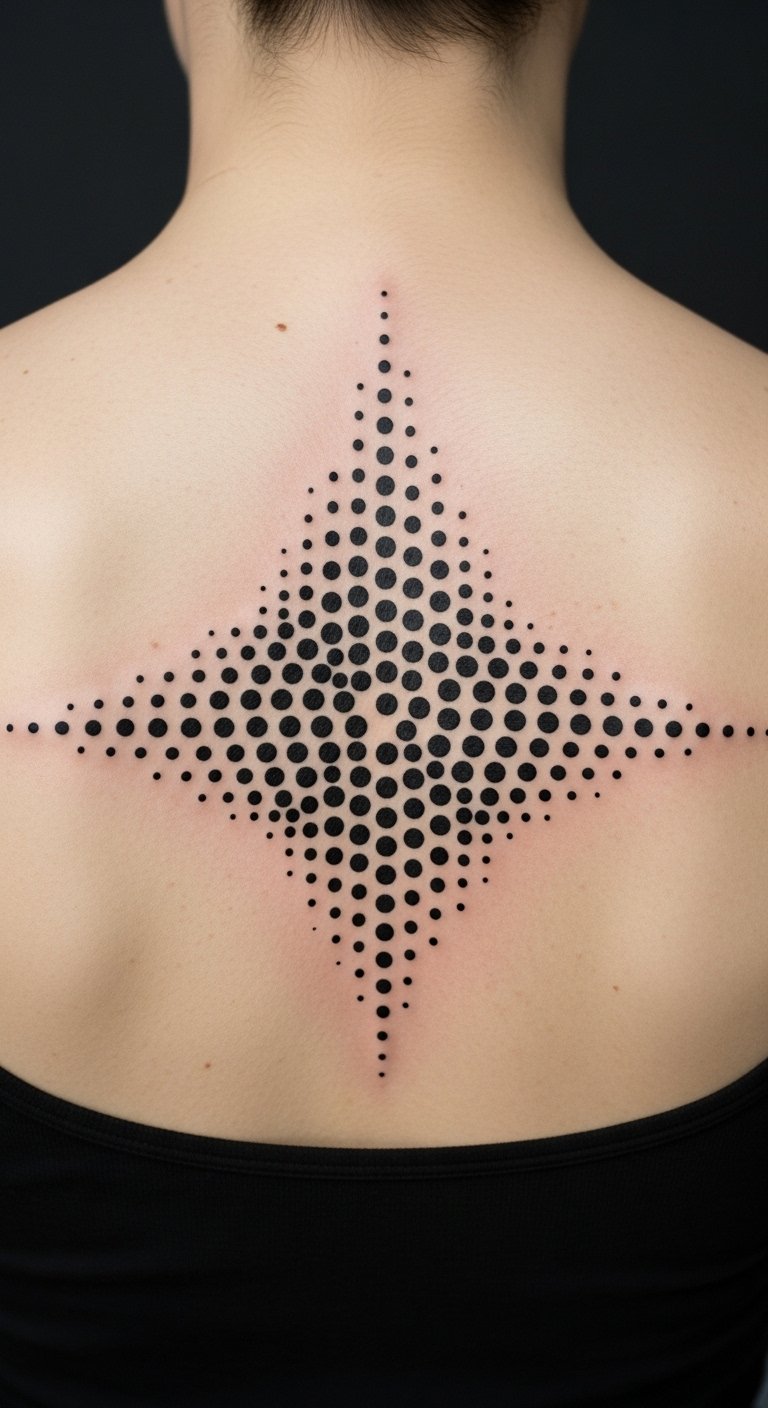
Dots that make your back look endless. Use a dot sticker set from a craft store to mock it up first—no cost involved. Back placement lets you show or hide as needed. Black dots keep it budget-friendly and impactful. Make it unique by spacing them to your back’s curve. Try punching holes in paper as a DIY preview. Artists often price these low for their simplicity. The depth effect surprises with just placement. Use home remedies like aloe for healing. It adds mystery to shirts or swimsuits.
6. Symmetrical Lines on Your Ankle
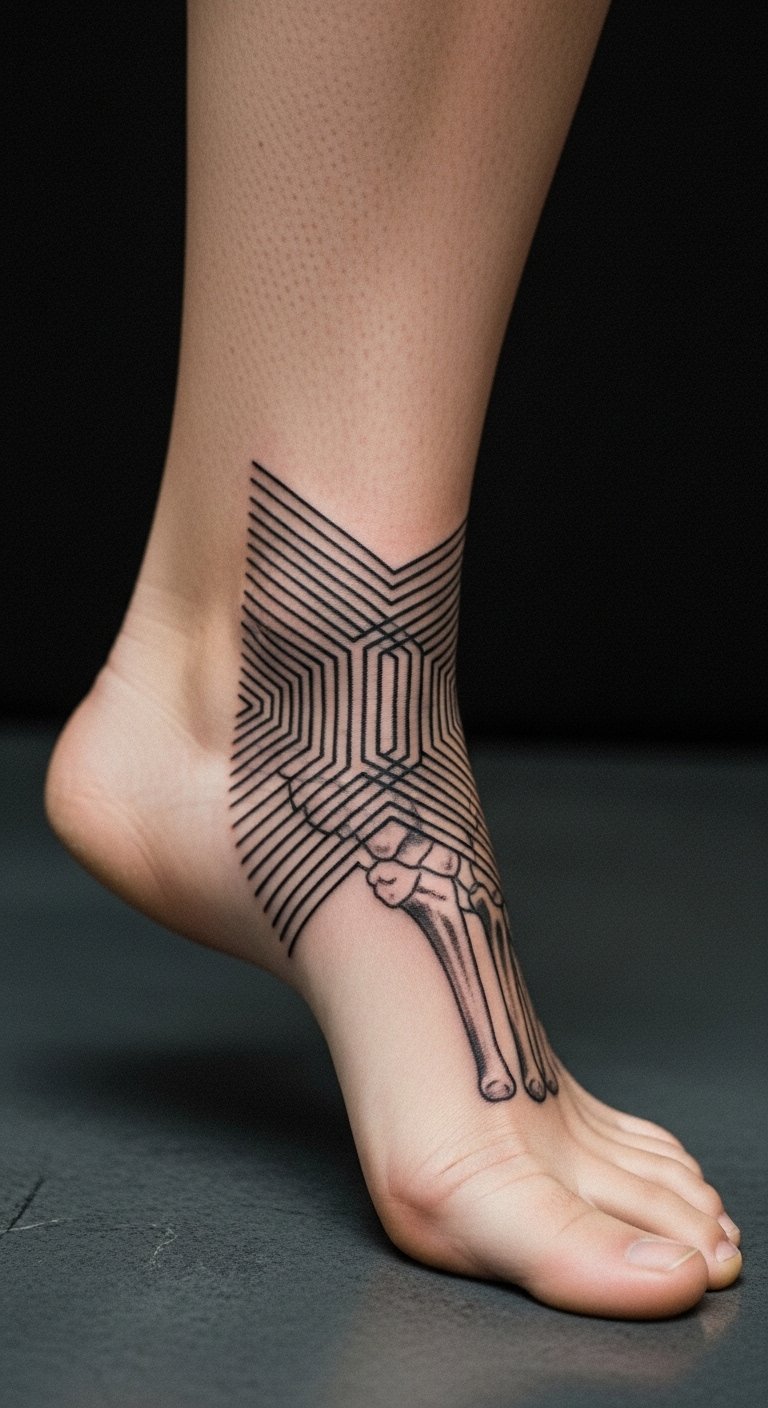
Lines that balance perfectly on your ankle. Sketch with a straight edge on paper for a fast setup. Ankles are great for discreet flair. Black lines cut costs and age well. Tailor it by mirroring the lines to your foot’s shape. Use tape to outline on your skin as practice. Find artists who do quick, cheap sessions for small areas. The symmetry creates calm with minimal ink. Care with basic bandages from your kit. Pair with socks for versatile style.
7. Movement Patterns on Your Thigh
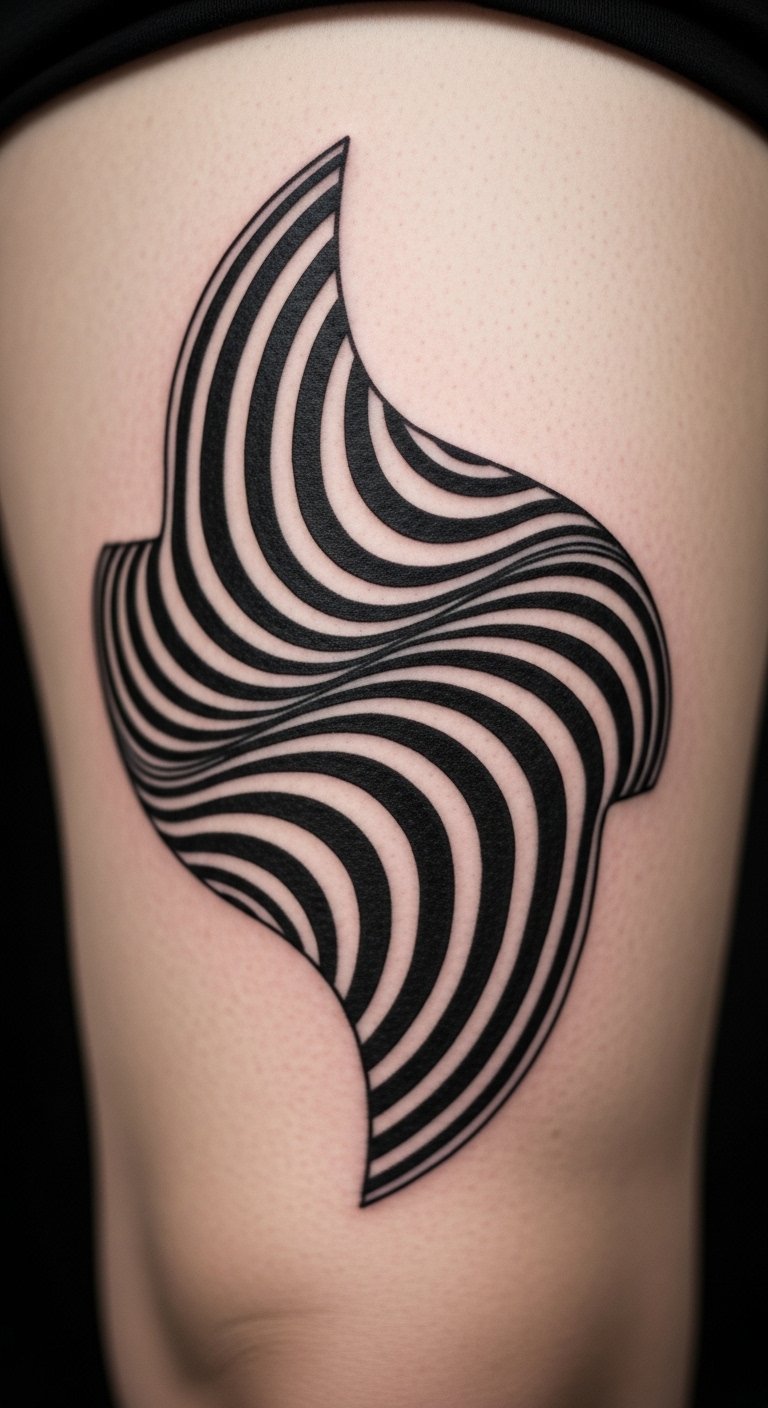
Patterns that seem to shift on your thigh. Draw curves on paper with a pen—it’s simple and free. Thighs offer space for bigger ideas. Black ink keeps expenses down. Personalize by flowing the patterns with your leg’s muscle. Test with fabric markers on clothes. Artists might bundle these with other work for savings. The movement fools eyes effortlessly. Heal using everyday creams. Show it off with shorts for fun looks.
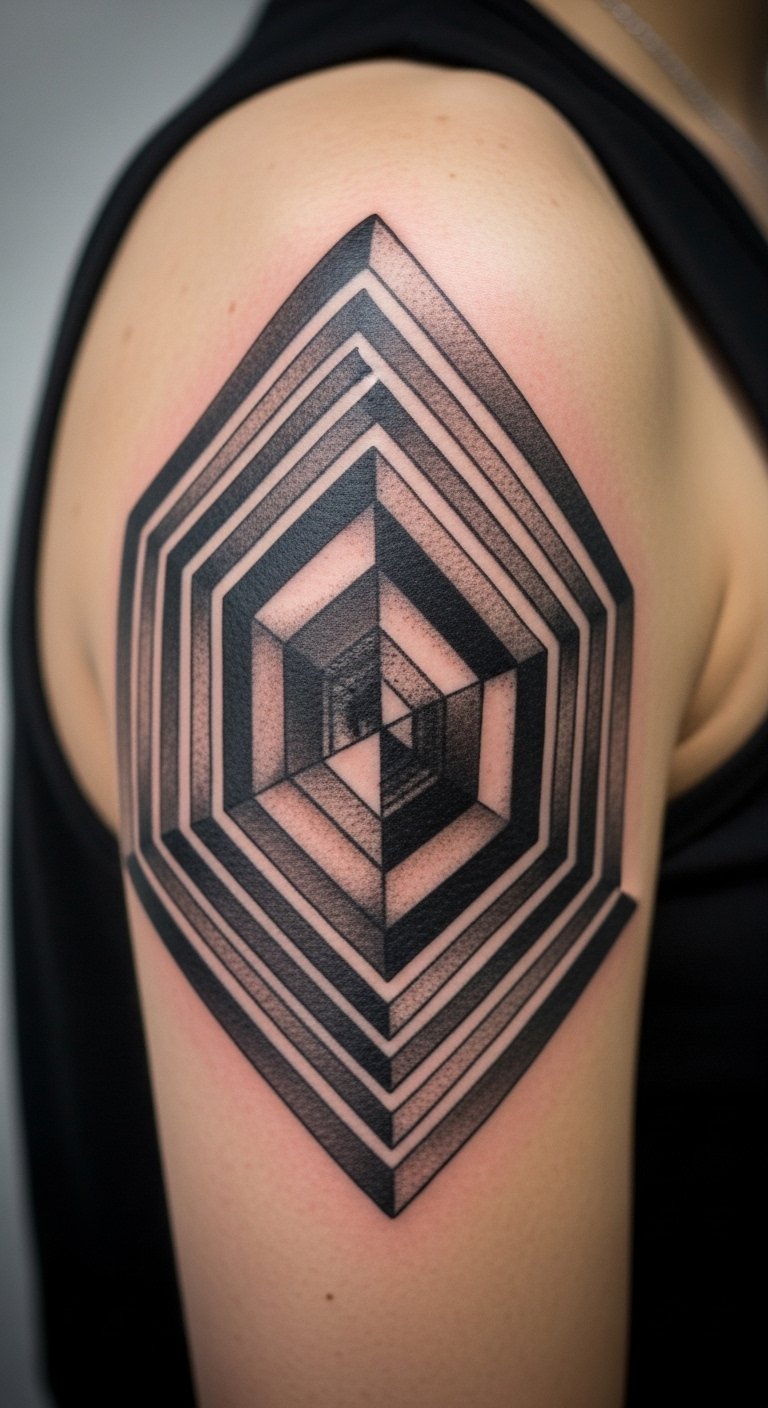
8. Illusion Grids on Your Chest
Grids that warp on your chest. Plan with grid paper drawings at home. Chest spots mix bold and personal. Black grids are affordable and striking. Adjust to fit your chest’s contours. Use string grids on your body for trials. Look for artist deals on geometric work. The illusion adds intrigue with ease. Use home salves for care. Layer under shirts for style shifts.
9. Repeating Circles on Your Upper Arm
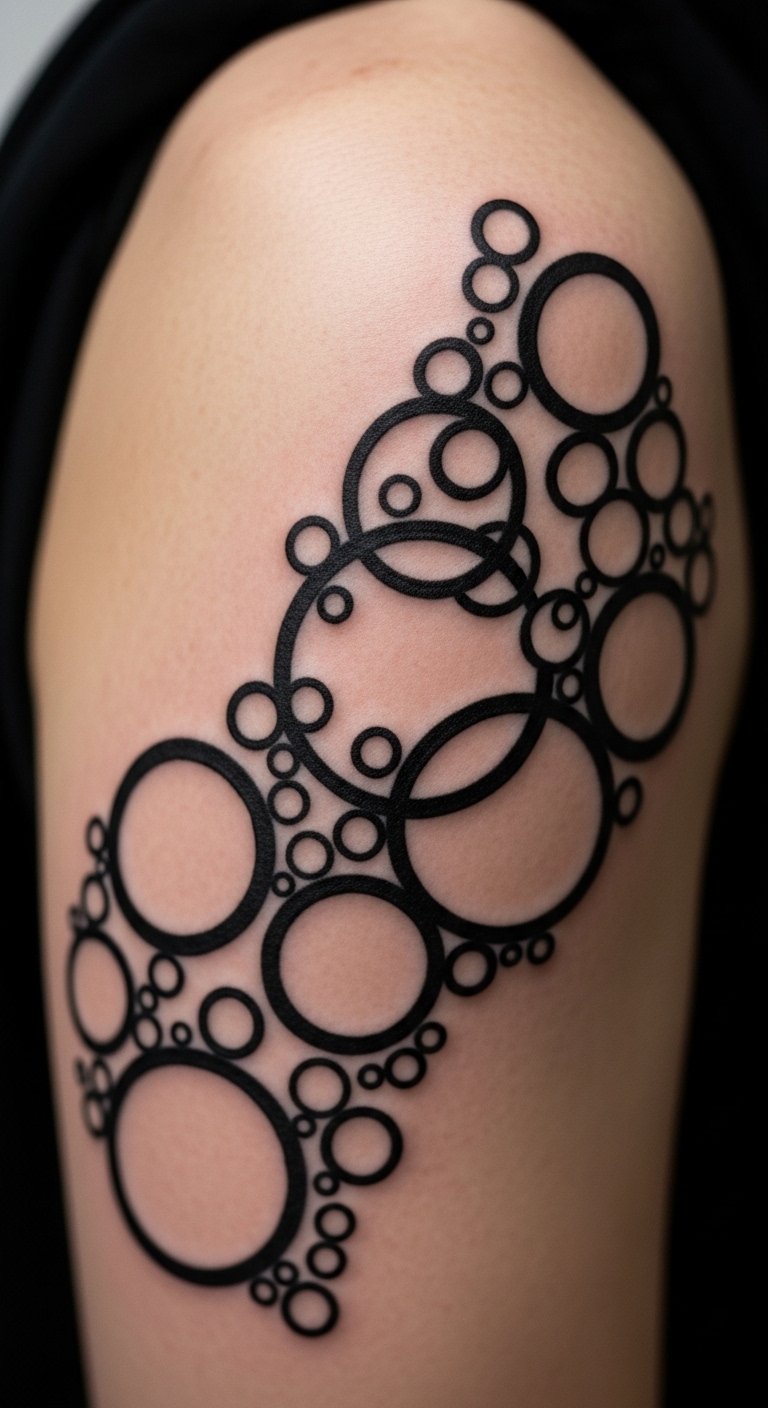
Circles that repeat and flow on your arm. Circle templates from crafts make planning cheap. Upper arms balance visibility and cover. Black circles mean simple, low-cost tattoos. Customize by sizing them to your arm. Practice with round stickers. Artists often price these accessibly. The rhythm engages without complexity. Tend with basic skin products. Match with jackets for varied outfits.
10. Depth Shadows on Your Ribs
Shadows that give depth to your ribs. Shade drawings on paper with pencils first. Ribs allow for intimate designs. Black shading stays budget-friendly. Adapt to your ribs’ natural lines. Try with charcoal sketches on paper. Find affordable artists for shaded work. The depth draws you in simply. Care with gentle washes. Reveal under tops for impact.
11. Twisting Ribbons on Your Neck

Ribbons that twist on your neck. Ribbon drawings on paper help plan it. Necks offer bold, visible spots. Black lines keep it economical. Make them follow your neck’s curve. Use ribbons as body tracers. Artists do these quickly and cheaply. The twist adds motion easily. Heal with daily routines. Accessorize with collars.
12. Layered Patterns on Your Hip
Patterns that layer on your hip. Layer paper cutouts for a free mock-up. Hips provide creative space. Black layers cut costs. Personalize to your hip’s shape. Test with layered stickers. Look for package deals from artists. The dimension surprises with basics. Use home lotions for maintenance. Pair with jeans for style.
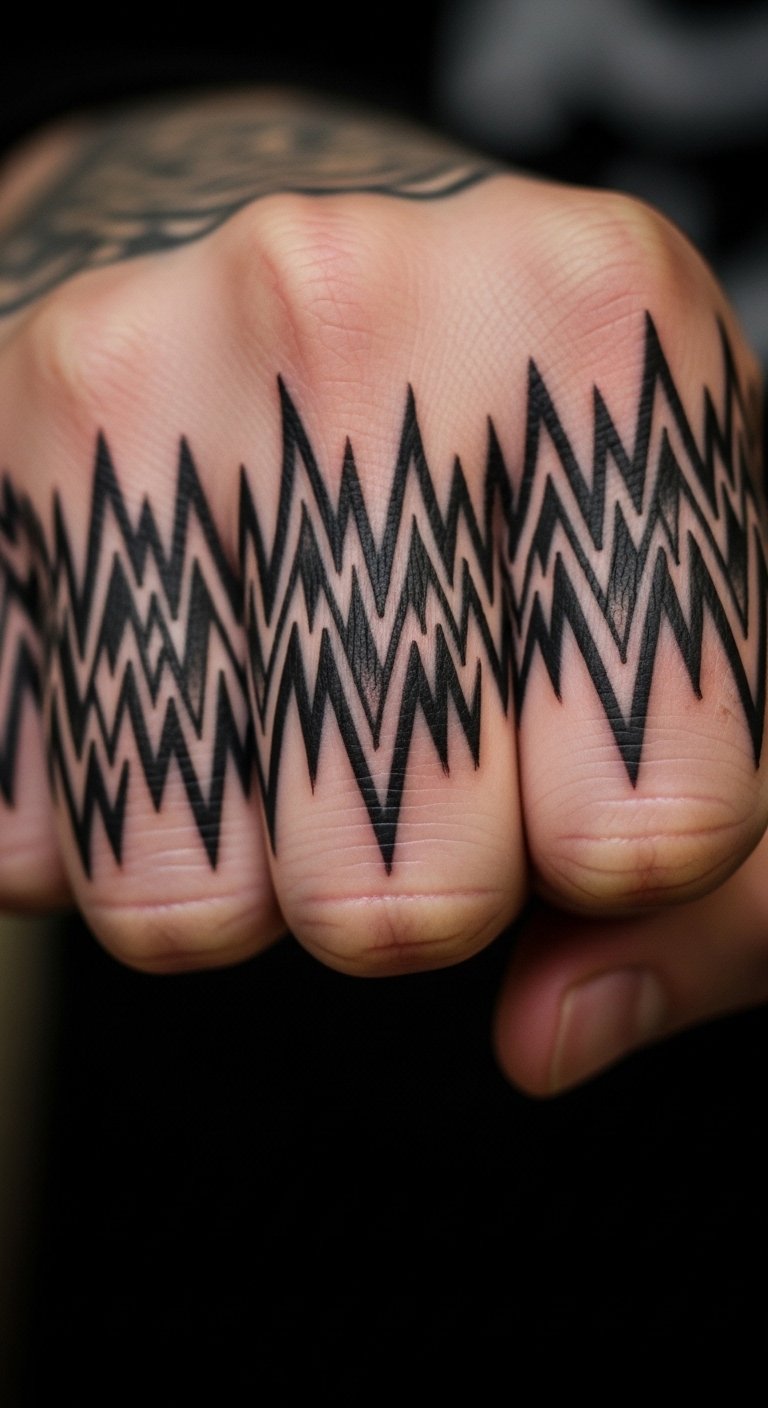
13. Zigzag Effects on Your Finger

Zigzags that energize your finger. Draw zigzags on paper quickly. Fingers are for subtle touches. Black effects are inexpensive. Tailor to finger length. Practice with nail art tools. Artists offer low prices for tiny tattoos. The energy pops with lines. Care with hand creams. Wear rings over it.
14. Optical Rings on Your Elbow
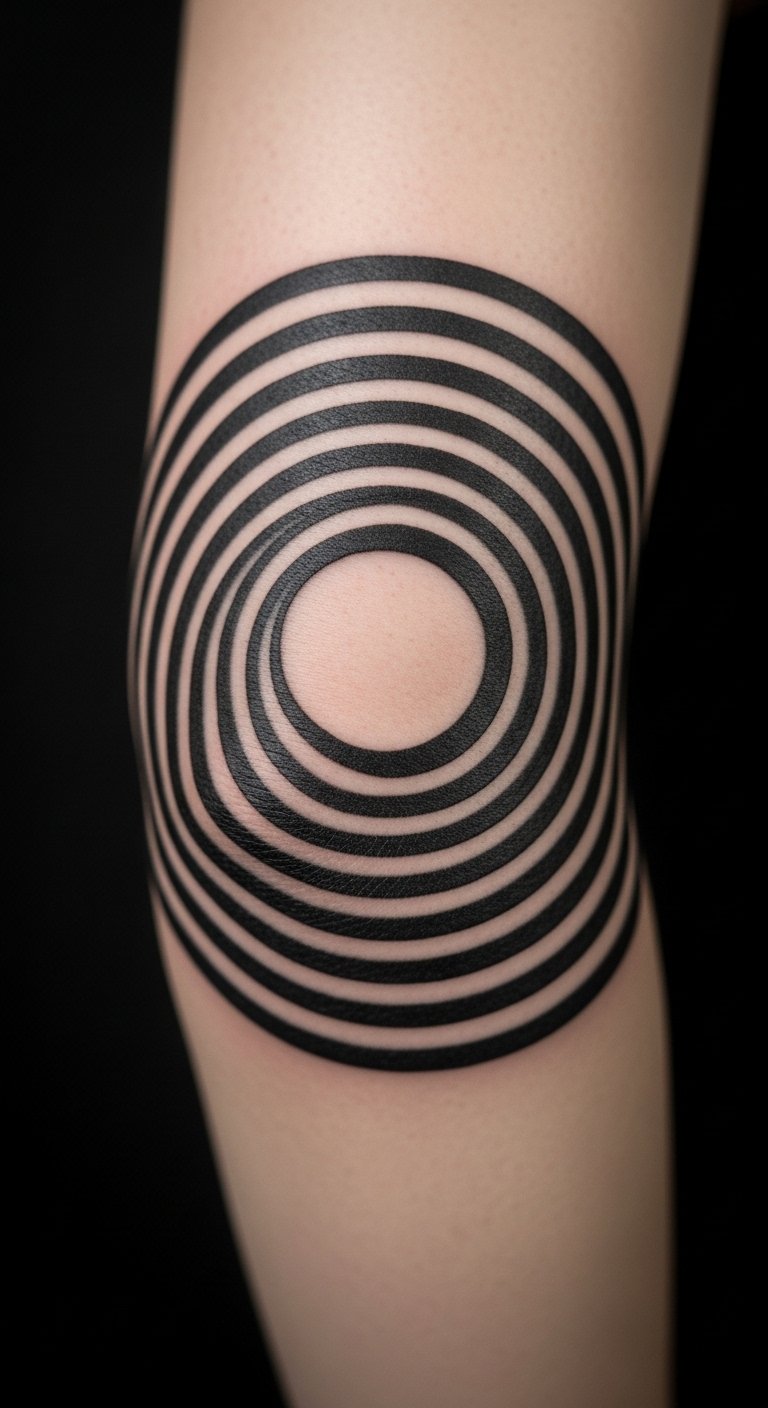
Rings that optically bend on your elbow. Ring stencils on paper make planning easy. Elbows handle movement well. Black rings stay affordable. Adjust for elbow flex. Use rings as templates. Find artists with quick slots. The optical effect is straightforward. Heal with elbow pads if needed. Show in short sleeves.
15. Harmonic Waves on Your Knee
Waves that harmonize on your knee. Wave drawings on paper are simple. Knees work for active folks. Black waves keep costs low. Fit to knee contours. Try with wave stickers. Artists price these reasonably. The flow feels natural. Use knee guards for care. Match with active wear.
16. Mosaic Tiles on Your Foot
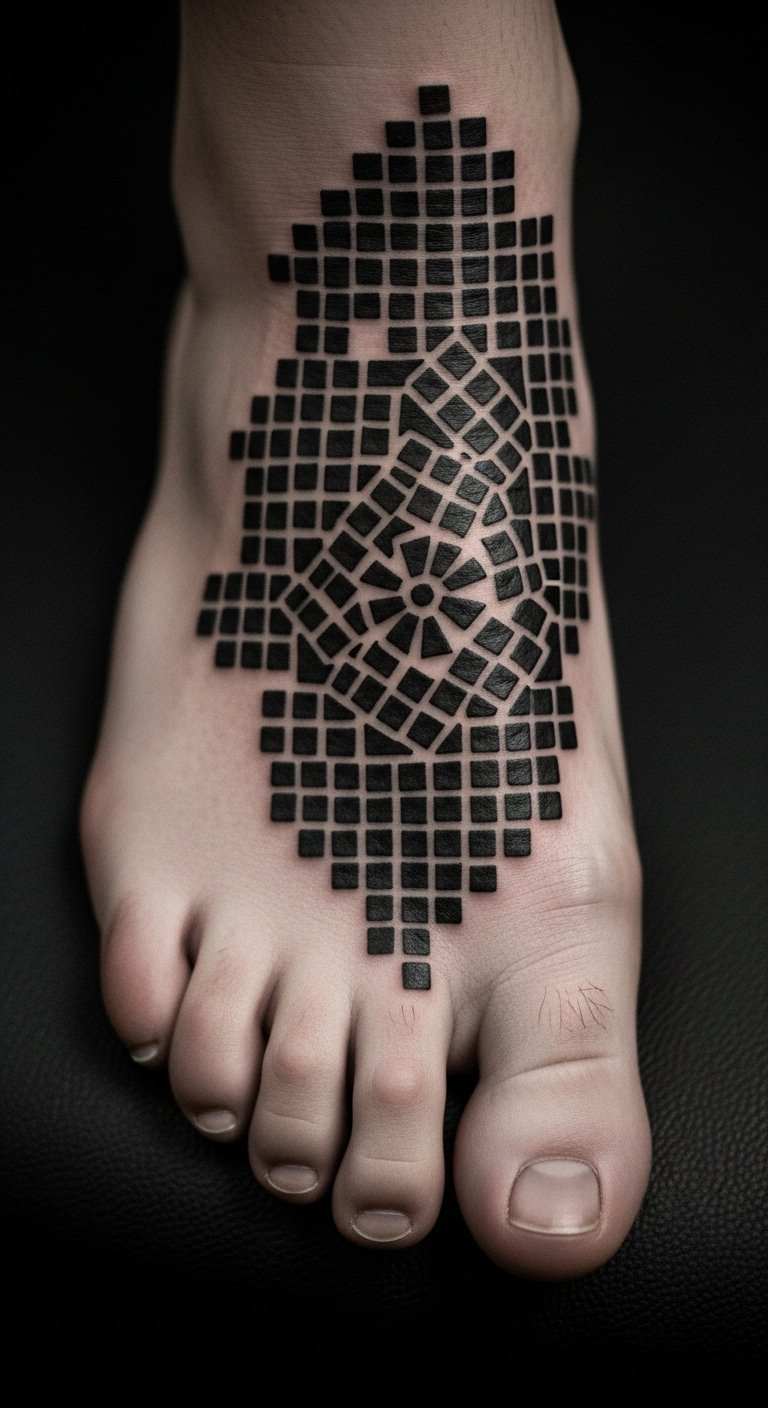
Tiles that mosaic on your foot. Tile sketches on paper help visualize. Feet are for grounded style. Black tiles are budget options. Customize to foot shape. Practice with tile stickers. Look for foot tattoo specials. The texture adds interest. Care with foot creams. Wear with sandals.
17. Converging Lines on Your Palm
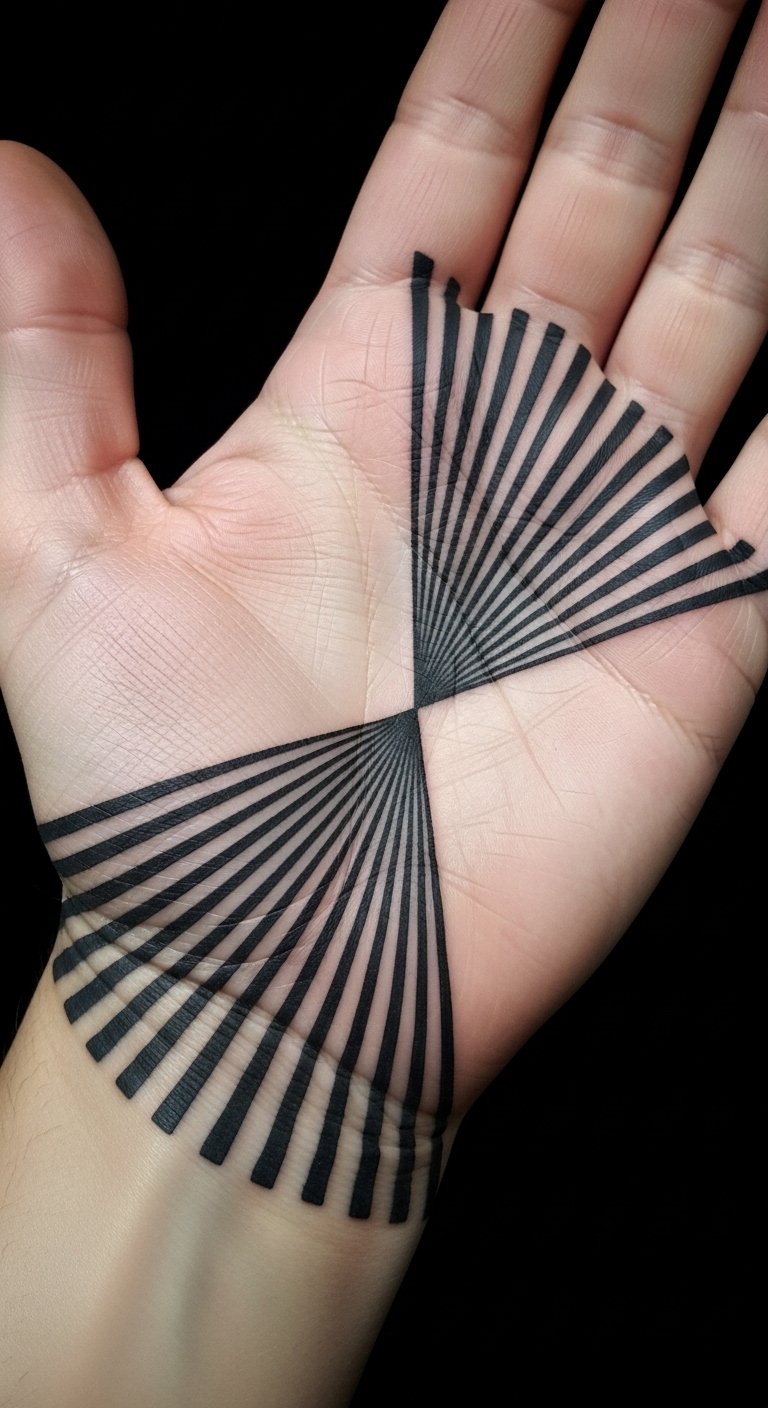
Lines that converge on your palm. Line drawings on paper are quick. Palms offer interactive designs. Black lines mean cheap sessions. Adapt to palm creases. Use hand strings for tests. Artists do palms affordably. The perspective draws attention. Protect with gloves. Use in daily gestures.
18. Floating Shapes on Your Collarbone
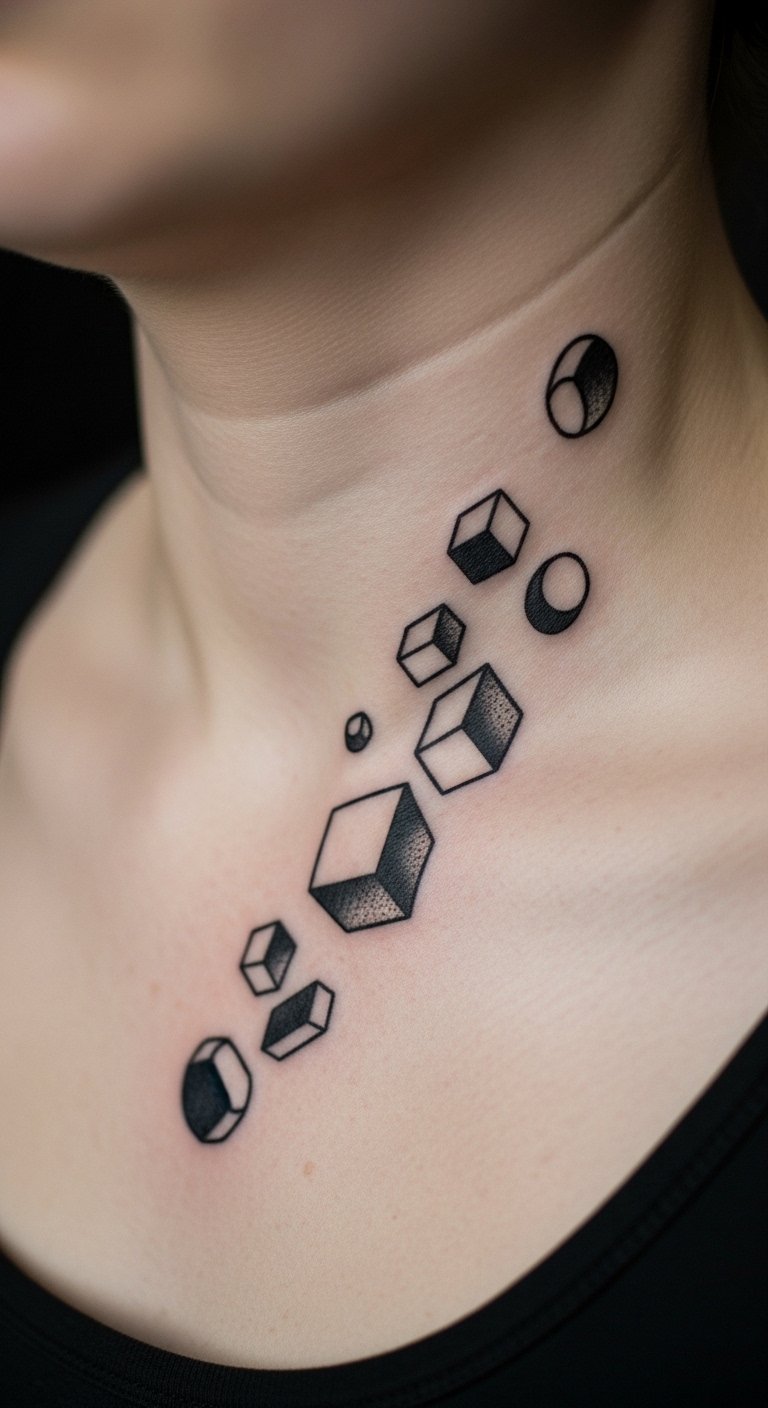
Shapes that float on your collarbone. Shape cutouts on paper aid planning. Collarbones are elegant spots. Black shapes keep it simple. Personalize to bone curve. Test with shape stickers. Find artist deals for bones. The lightness lifts looks. Heal with neck care. Layer with necklaces.
19. Radiating Stars on Your Side
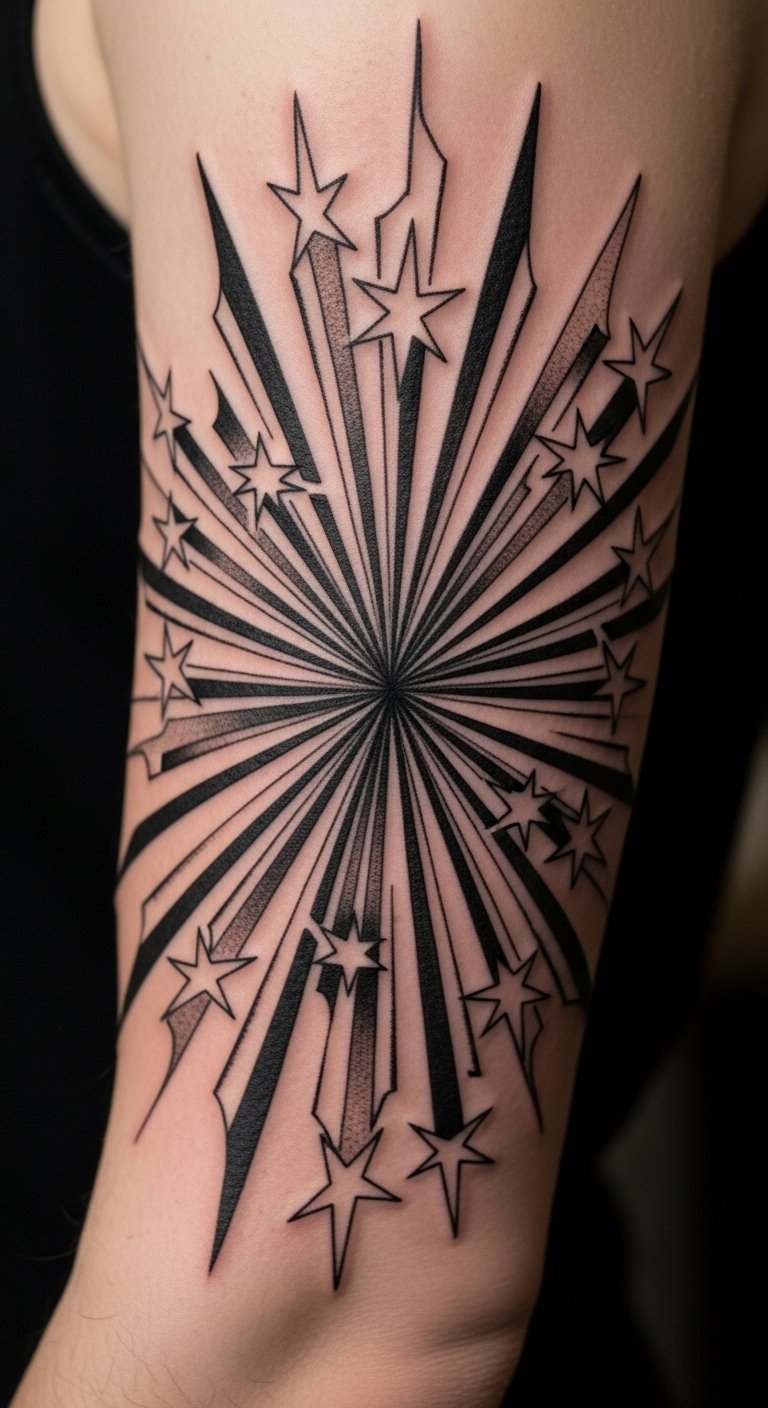
Stars that radiate on your side. Star drawings on paper are easy. Sides allow for expansion. Black stars are cost-effective. Fit to side curves. Use star templates. Artists offer side packages. The expansion creates wonder. Care with side supports. Reveal in fitted clothes.
20. Blending Patterns on Your Lower Back
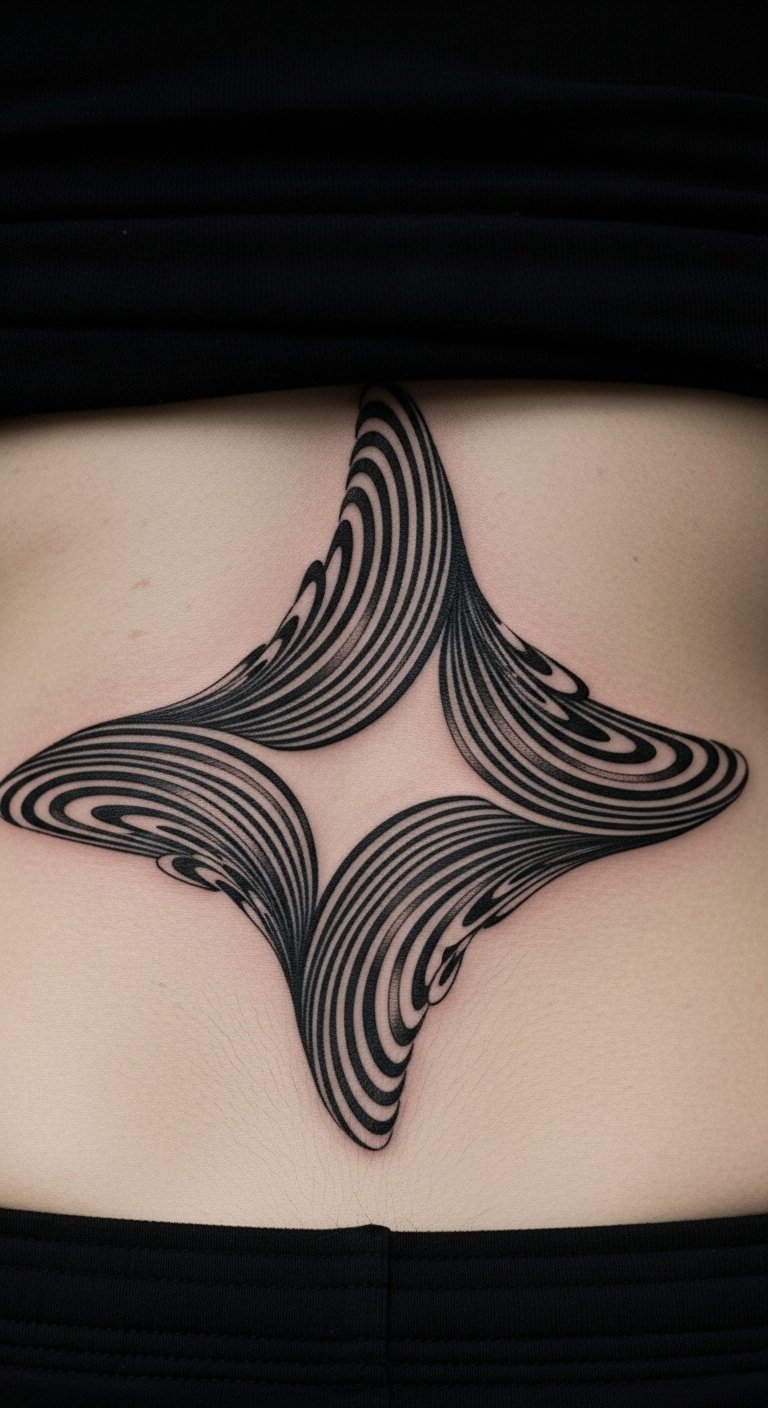
Patterns that blend on your lower back. Pattern collages on paper help. Lower backs are personal areas. Black blending saves money. Tailor to back flow. Practice with pattern fabrics. Look for back tattoo options. The unity ties it together. Use back creams. Hide or show as needed.
21. Interlocking Rings on Your Ear
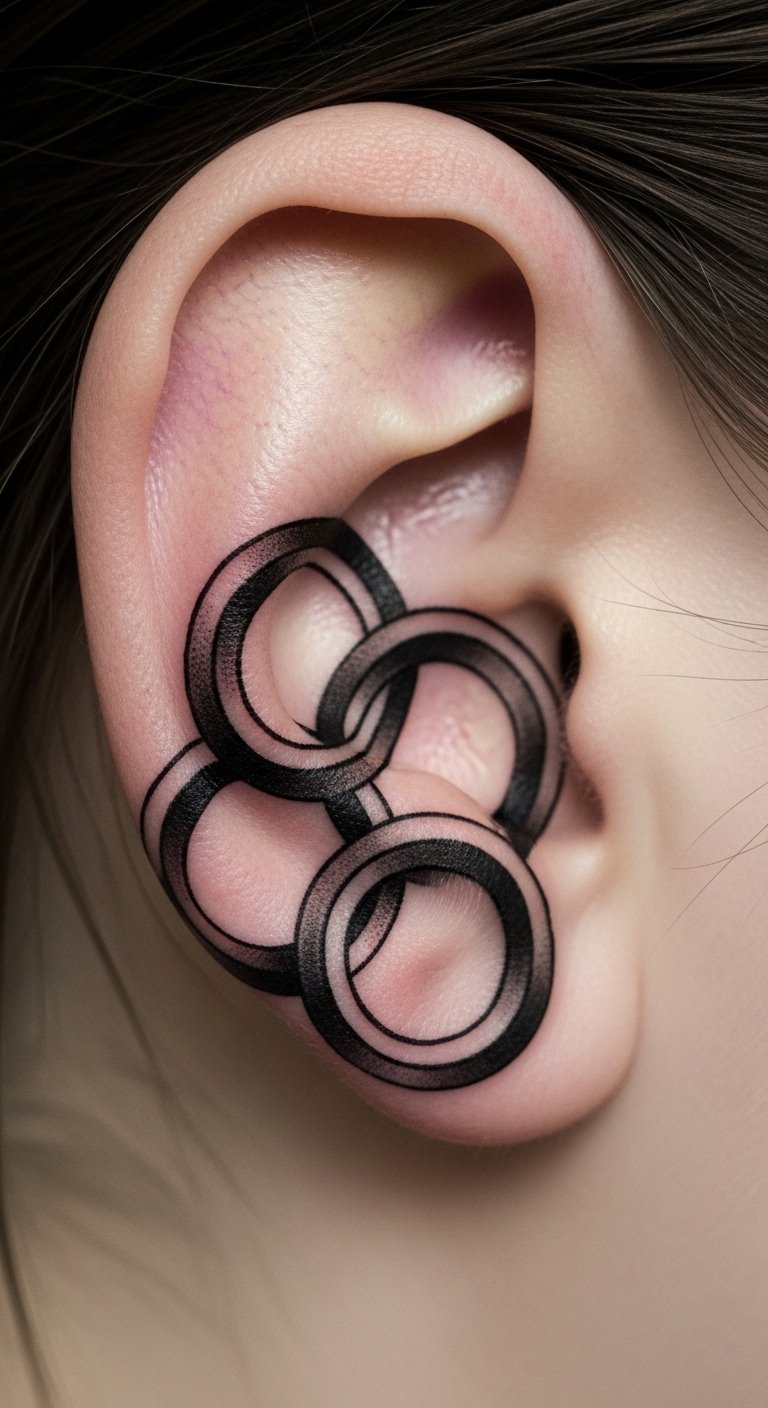
Rings that interlock on your ear. Ring sketches on paper are straightforward. Ears are for delicate touches. Black rings are inexpensive. Adjust for ear shape. Test with ear jewelry. Artists do ears cheaply. The connection feels linked. Care with ear drops. Pair with earrings.
22. Pulsing Dots on Your Chest
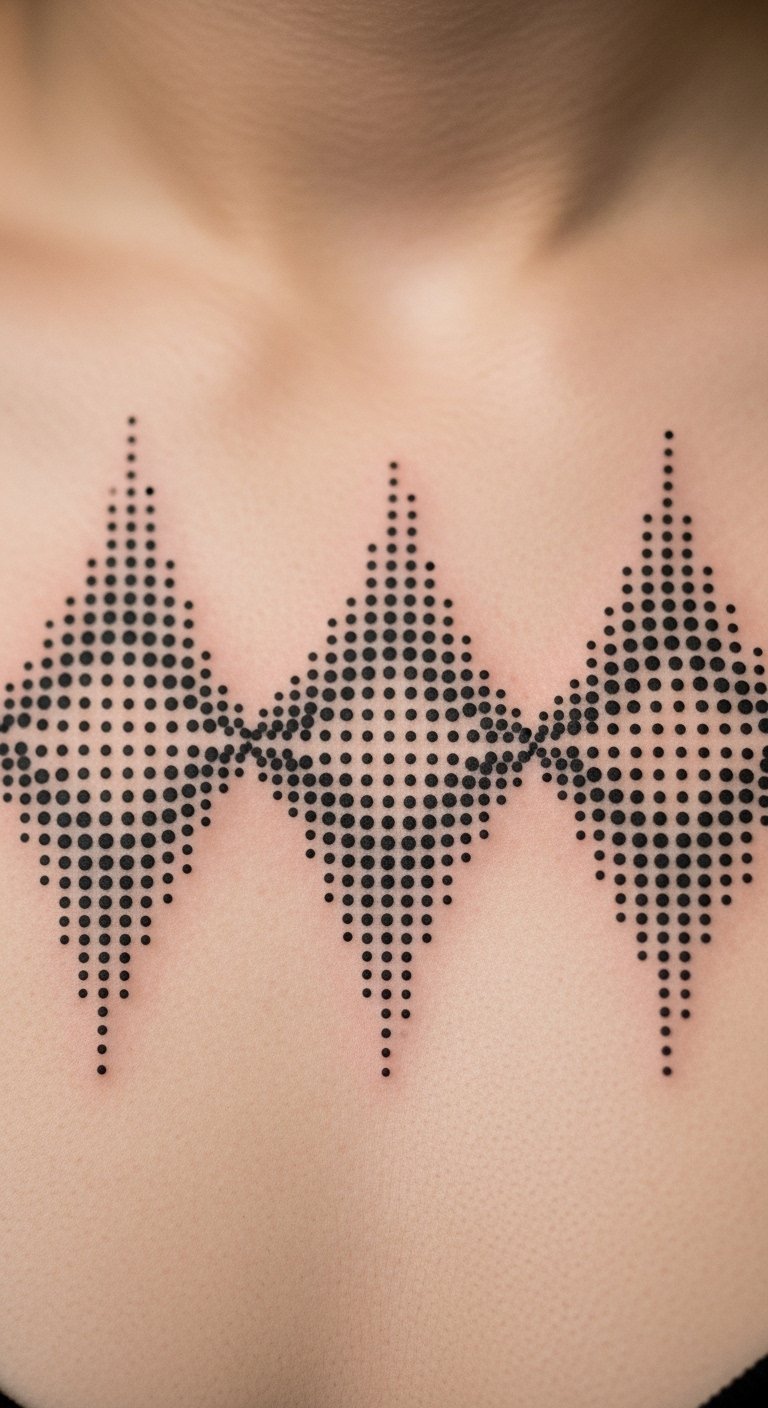
Dots that pulse on your chest. Dot patterns on paper are simple. Chests show emotion. Black dots cut costs. Personalize to chest breadth. Use dot stamps. Find artist specials for dots. The vibration adds life. Heal with chest balms. Wear under buttons.
23. Wavy Grids on Your Shin
Grids that wave on your shin. Grid drawings on paper aid. Shins are for strong lines. Black grids are affordable. Fit to shin length. Practice with grid paper. Artists price shins low. The distortion plays tricks. Care with shin guards. Show in pants rolls.
24. Spiraling Grids on Your Bicep
Grids that spiral on your bicep. Spiral grids on paper help. Biceps build muscle style. Black spirals save on ink. Adapt to bicep swell. Use grid spirals as guides. Look for bicep deals. The twist energizes arms. Use arm creams. Flex in tees.
25. Overlapping Circles on Your Forehead
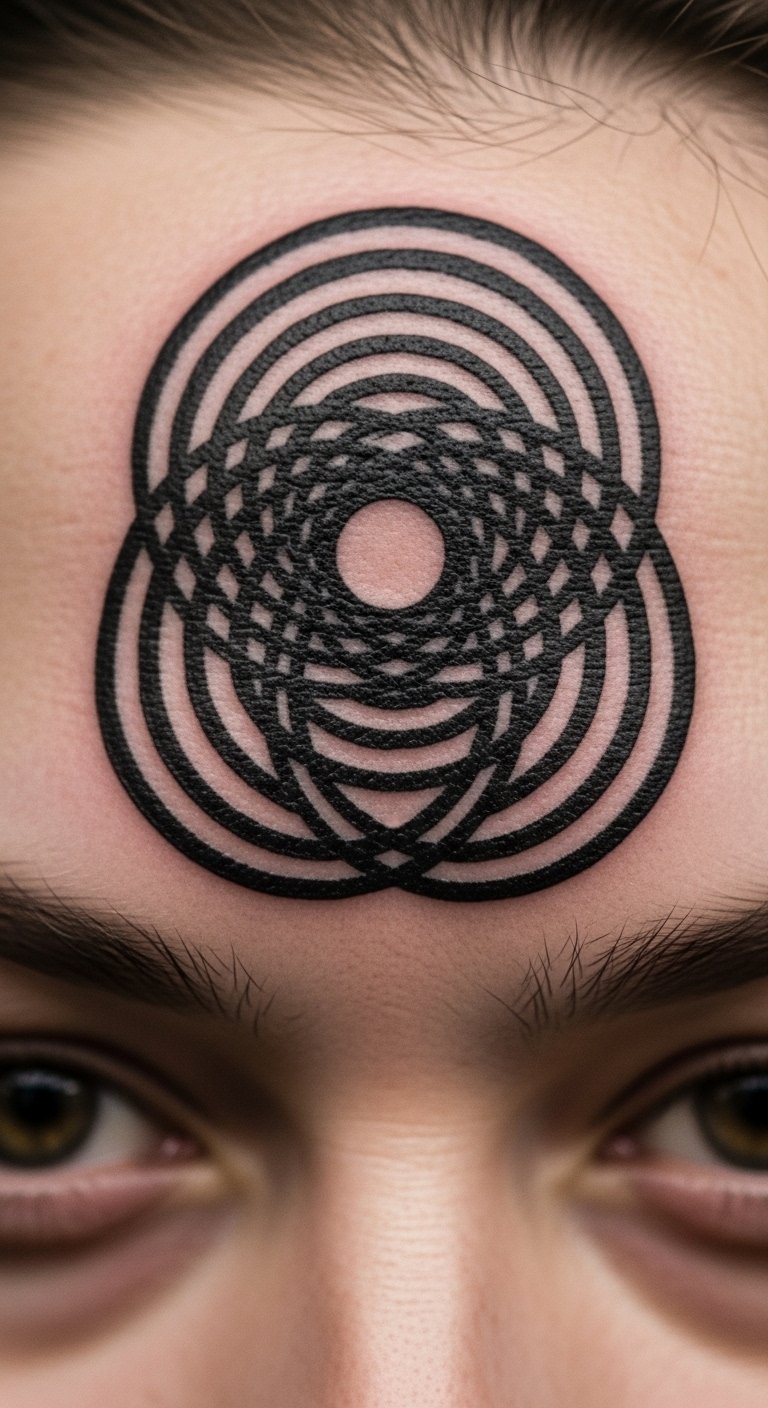
Circles that overlap on your forehead. Circle overlaps on paper plan it. Foreheads are bold choices. Black circles are cheap. Customize to forehead space. Test with circle stickers. Artists offer forehead options. The layers add depth. Care with forehead oils. Cover with hats.
26. Jagged Waves on Your Knuckle
Waves that jag on your knuckle. Wave sketches on paper are fast. Knuckles handle wear. Black waves are economical. Fit to knuckle bumps. Use wave tools for practice. Find knuckle tattoo deals. The edge sharpens looks. Protect with gloves. Use in handshakes.
27. Echoing Lines on Your Temple

Lines that echo on your temple. Line echoes on paper help. Temples are thoughtful spots. Black lines keep costs down. Personalize to temple curve. Practice with line stickers. Artists do temples affordably. The repetition creates flow. Heal with temple creams. Hide with hair.
28. Fractal Patterns on Your Abdomen
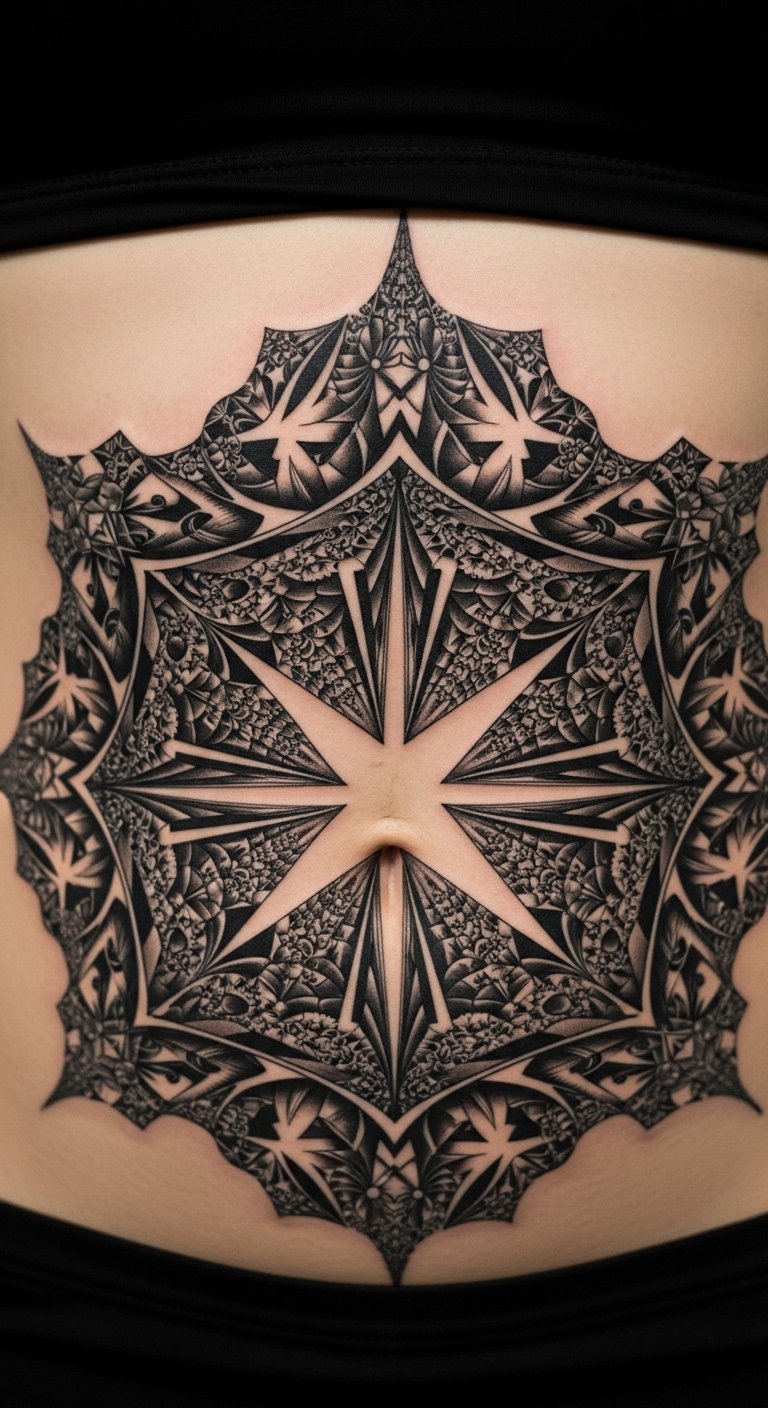
Patterns that fractal on your abdomen. Fractal drawings on paper are fun. Abdomens offer canvas space. Black fractals are budget picks. Adapt to abdomen shape. Use fractal prints for tests. Look for abdomen specials. The complexity intrigues. Care with abdomen lotions. Show in swimsuits.
29. Blurred Edges on Your Toe
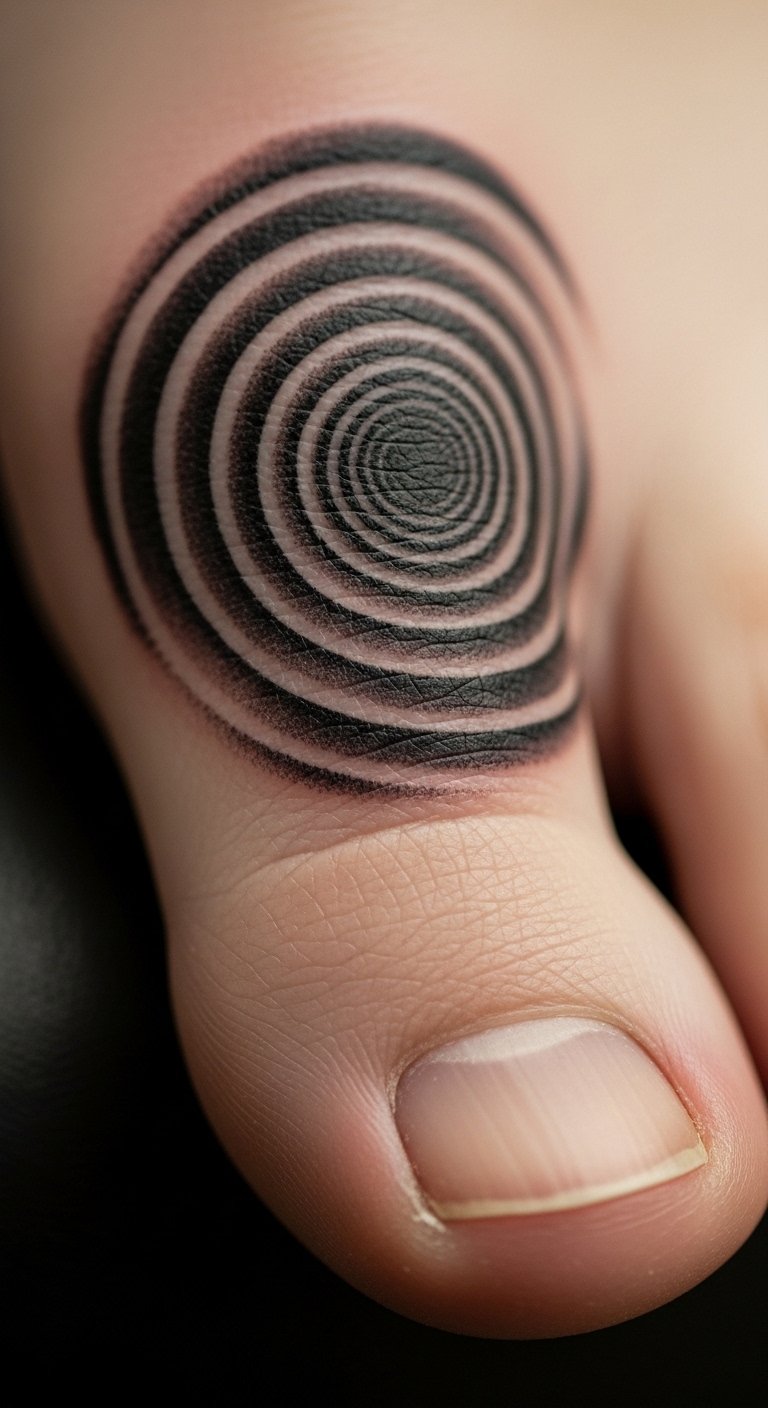
Edges that blur on your toe. Edge sketches on paper are easy. Toes are for tiny flair. Black edges are inexpensive. Tailor to toe form. Test with edge stickers. Artists price toes low. The softness adds charm. Use foot care routines. Wear with open shoes.
These 29 op art tattoos show how a few clever lines can change your everyday look with ease. Grab a pen, sketch an idea, and find a local artist to make it real—start small and watch your style grow.